Integrate your GitLab server with Bitbucket Cloud (FREE SELF)
You can set up Bitbucket.org as an OAuth 2.0 provider to use your Bitbucket.org account credentials to sign in to GitLab. You can also import your projects from Bitbucket.org.
- To use Bitbucket.org as an OmniAuth provider, follow the Bitbucket OmniAuth provider section.
- To import projects from Bitbucket, follow both the Bitbucket OmniAuth provider and Bitbucket project import sections.
Bitbucket OmniAuth provider
To enable the Bitbucket OmniAuth provider you must register your application with Bitbucket.org. Bitbucket generates an application ID and secret key for you to use.
-
Sign in to Bitbucket.org.
-
Go to your individual user settings (Bitbucket settings) or a team's settings (Manage team), depending on how you want to register the application. It does not matter if the application is registered as an individual or a team, that is entirely up to you.
-
In the left menu under Access Management, select OAuth.
-
Select Add consumer.
-
Provide the required details:
-
Name: This can be anything. Consider something like
<Organization>'s GitLabor<Your Name>'s GitLabor something else descriptive. -
Application description: Optional. Fill this in if you wish.
-
Callback URL: (Required in GitLab versions 8.15 and greater) The URL to your GitLab installation, such as
https://gitlab.example.com/users/auth. Leaving this field empty results in anInvalid redirect_urimessage.WARNING: To help prevent an OAuth 2 covert redirect vulnerability in which users' GitLab accounts could be compromised, append
/users/authto the end of the Bitbucket authorization callback URL. -
URL: The URL to your GitLab installation, such as
https://gitlab.example.com.
-
-
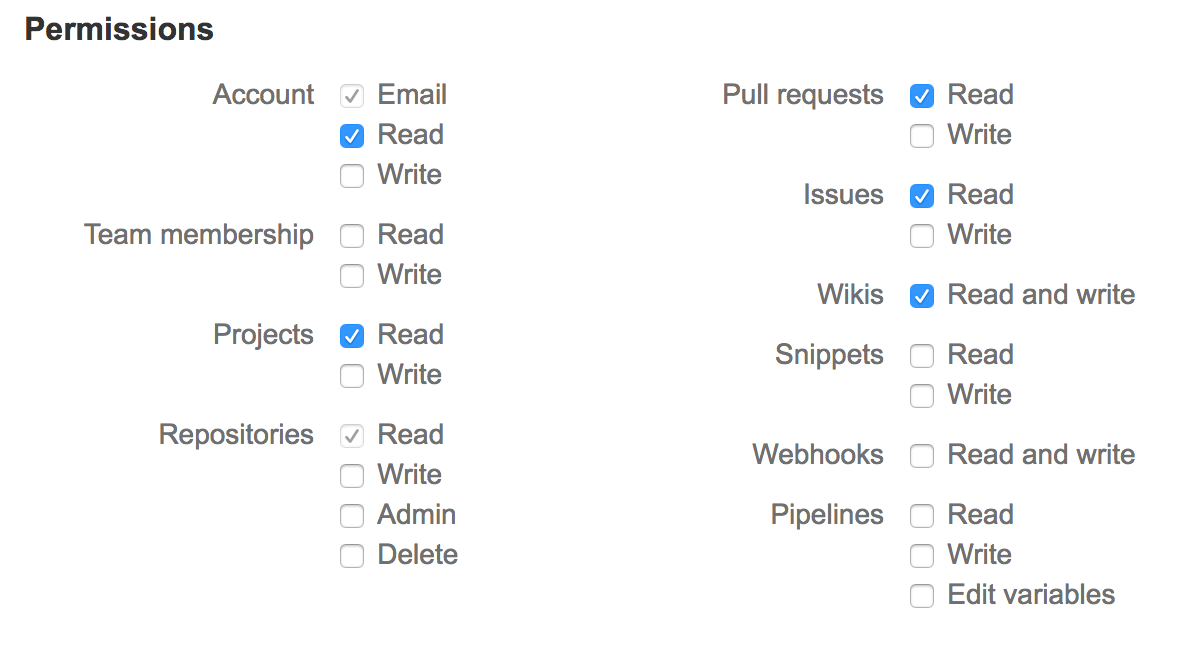
Grant at least the following permissions:
Account: Email, Read
Projects: Read
Repositories: Read
Pull Requests: Read
Issues: Read
Wiki: Read and Write
-
Select Save.
-
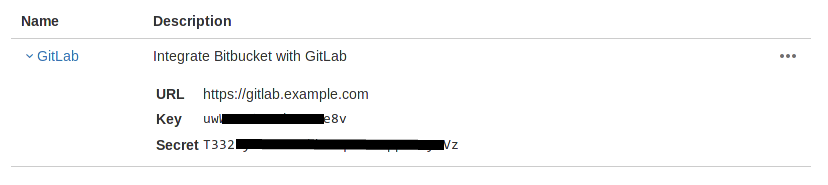
Select your newly created OAuth consumer, and you should now see a Key and Secret in the list of OAuth consumers. Keep this page open as you continue the configuration.
-
On your GitLab server, open the configuration file:
# For Omnibus packages sudo editor /etc/gitlab/gitlab.rb # For installations from source sudo -u git -H editor /home/git/gitlab/config/gitlab.yml -
Add the Bitbucket provider configuration:
For Omnibus packages:
gitlab_rails['omniauth_providers'] = [
  {
    name: "bitbucket",
    # label: "Provider name", # optional label for login button, defaults to "Bitbucket"
    app_id: "<bitbucket_app_key>",
    app_secret: "<bitbucket_app_secret>",
    url: "https://bitbucket.org/"
  }
]
For installations from source:
omniauth:
  enabled: true
  providers:
    - { name: 'bitbucket',
        # label: 'Provider name', # optional label for login button, defaults to "Bitbucket"
        app_id: '<bitbucket_app_key>',
        app_secret: '<bitbucket_app_secret>',
        url: 'https://bitbucket.org/' }
Where
<bitbucket_app_key>is the Key and<bitbucket_app_secret>the Secret from the Bitbucket application page. -
Save the configuration file.
-
For the changes to take effect, reconfigure GitLab if you installed using Omnibus GitLab, or restart if you installed from source.
On the sign-in page there should now be a Bitbucket icon below the regular sign-in form. Select the icon to begin the authentication process. Bitbucket asks the user to sign in and authorize the GitLab application. If successful, the user is returned to GitLab and signed in.
Bitbucket project import
After the above configuration is set up, you can use Bitbucket to sign into GitLab and start importing your projects.
If you want to import projects from Bitbucket, but don't want to enable signing in, you can disable Sign-Ins in the Admin Area.